Emulation Platform for Software-Defined Wireless Networks
Main Page
Get Started
Part 1: Mininet-WiFi Usage
Part 2: Advanced Options
Part 3: Mininet-WiFi Commands
Containernet
Manet Routing Protocols
Mobility
Propagation Models
SixLoWPAN
IEEE 802.11p
mac80211_hwsim
P4
SUMO
Publications
Use Case Catalogue
Video Demos
FAQ
The Mininet-WiFi Book
Part 2: Advanced Startup Options
Run a Regression Test You do not need to drop into the CLI; Mininet-WiFi can also be used to run self-contained regression tests.
Run a regression test:
$ sudo mn --wifi --test pingpair
This command created a minimal topology, started up the OpenFlow reference controller, ran an all-pairs-ping test, and tore down both the topology and the controller.
Another useful test is iperf (give it about 10 seconds to complete):
$ sudo mn --wifi --test iperf
This command created the same Mininet-WiFi, ran an iperf server on one host, ran an iperf client on the second host, and parsed the bandwidth achieved.
The default topology is a single ap connected to two stations. You could change this to a different topo with –topo, and pass parameters for that topology’s creation. For example, to verify all-pairs ping connectivity with one ap and three stations:
Run a regression test:
$ sudo mn --wifi --test pingall --topo single,3
Adjustable Verbosity
The default verbosity level is info, which prints what Mininet-WiFi is doing during startup and teardown. Compare this with the full debug output with the -v param:
$ sudo mn --wifi -v debug
...
mininet> exit
Lots of extra detail will print out. Now try output, a setting that prints CLI output and little else:
$ sudo mn --wifi -v output
mininet> exit
Plotting Graph
You need to call net.plotGraph(). See sample files at /examples for your convenience.
Customizing the line style
When you create a link between two APs a solid line between the two APs is created. However, if you wish to customize the line style you can do as follows:
net.addLink(ap1, ap2, ls='.')
The list of line styles supported by Mininet-WiFi is the same that matplotlib supports.
Client Isolation
By default, stations associated with the same access point can communicate with each other without OpenFlow rules. If you want to enable OpenFlow in such case, you need to enable the client isolation. You can either try
sudo mn --wifi --client-isolation
or take examples/simplewifitopology.py as reference.
Client isolation can be used to prevent low-level bridging of frames between associated stations in the BSS. By default, this bridging is allowed.
You may also want to refer to the OpenFlow spec. B.6.3 IN PORT Virtual Port The behavior of sending out the incoming port was not clearly defined in earlier versions of the specification. It is now forbidden unless the output port is explicitly set to OFPP_IN_PORT virtual port (0xfff8) is set. The primary place where this is used is for wireless links, where a packet is received over the wireless interface and needs to be sent to another host through the same interface. For example, if a packet needed to be sent to all interfaces on the switch, two actions would need to be specified: ”actions=output:ALL,output:IN PORT”.
Multiple Wireless Network Interfaces
Wireless nodes can have multiple wireless interfaces. The wlans parameter Multiple Wirelessallows you to add many interfaces on a single node. For example, let’s take the code below:
sta1 = net.addStation('sta1', wlans=2)
wlans=2 means that two wireless interfaces will be creted for sta1. APs can have multiple wireless interfaces as well, however, they deserve a particular attention. For example, let’s take the code below:
ap1 = net.addAccessPoint('ap1', wlans=2, ssid=['ssid1','ssid2'], mode='g', channel='1')
You have to define two SSIDs separated by comma in array style. If you do not want two SSIDs for some reason, you can do like below:
ap1 = net.addAccessPoint('ap1', wlans=2, ssid=['ssid1',''], mode='g', channel='1')
or even
ap1 = net.addAccessPoint('ap1', wlans=2, ssid=ssid1, mode='g', channel='1')
Multiple SSIDs over a Single AP
It is very common for an organization to have multiple SSIDs in their wireless network for various purposes, including: (i) to provide different security mechanisms such as WPA2-Enterprise for your employees and an “open” network with a captive portal for guests; (ii) to split bandwidth among different types of service; or (iii) to reduce costs by reducing the amount of physical access points. In Mininet-WiFi, an unique AP supports up to 8 different SSIDs (limitation imposed by mac80211_hwsim). Multiple SSIDs can be configured as below:
ap1 = net.addAccessPoint('ap1', vssids='ssid1,ssid2,ssid3,ssid4', ssid='ssid', mode='g', channel='1')
Network Address Translator (NAT)
You can add a NAT to the Mininet-WiFi network by calling net.addNAT(), as illustrated in the code below.
#!/usr/bin/python

"Example to create a Mininet-WiFi topology and connect it to the internet via NAT"

from mininet.node import Controller
from mininet.log import setLogLevel, info
from mn_wifi.cli import CLI_wifi
from mn_wifi.net import Mininet_wifi


def topology():

    "Create a network."

    net = Mininet_wifi(controller=Controller)

    info("*** Creating nodes\n")
    ap1 = net.addAccessPoint('ap1', ssid='new-ssid', mode='g', channel='1', position='10,10,0')
    sta1 = net.addStation('sta1', position='10,20,0')
    c1 = net.addController('c1', controller=Controller)

    info("*** Configuring wifi nodes\n")
    net.configureWifiNodes()

    info("*** Starting network\n")
    net.build()
    net.addNAT(name='nat0', linkTo='ap1', ip='192.168.100.254').configDefault()
    c1.start()
    ap1.start([c1])

    info("*** Running CLI\n")
    CLI_wifi(net)

    info("*** Stopping network\n")
    net.stop()


if __name__ == '__main__':
    setLogLevel('info')
    topology()
According to the code below, addNAT creates a Node named nat0 linked with ap1. The IP 192.168.100.254 will be assigned to nat0 and this is the default gateway assigned to the all nodes that make up the network topology (only sta1 in our case).
net.addNAT(name='nat0', linkTo='ap1', ip='192.168.100.254').configDefault()
Authentication
Mininet-WiFi supports WEP, WPA, WPA2 and WPA3. A sample file is available for your convenience at examples/authentication.
note: OVS does not support WPA in the kernel space. The only way to make OVS work with WPA is by setting datapath = “user” as below:
ap1 = net.addAccessPoint('ap1', .... datapath='user')
Background Scanning
wpa_supplicant behavior for background scanning can be specified by configuring a bgscan module. This module is responsible for requesting background scans for the purpose of roaming within an ESS (i.e., within a single network block with all the APs using the same SSID). You can customize bgscan with the following parameters: bgscan_threshold, s_inverval, l_interval and bgscan_module. More information about these parameters can be found at wpa_supplicant.conf.
Disabling auto-association
When bgscan is not being activated, Mininet-WiFi internaly performs auto-association (handover) when the station reaches a new AP. You can disable this behaviour by following the examples below:
For scenarios without mobility:
net = Mininet_wifi(... autoAssociation = False)
For scenarios with mobility:
net = Mininet_wifi(... allAutoAssociation = False)
Energy Consumption
We have started an implementation of an Energy Consumption model where you can set the voltage to the node. In this example you can get the total of energy consumption with sensor1.wintfs[0].consumption. Please note that this is only an initial implementation and contributions are most than welcome.
Building Topologies with GUI
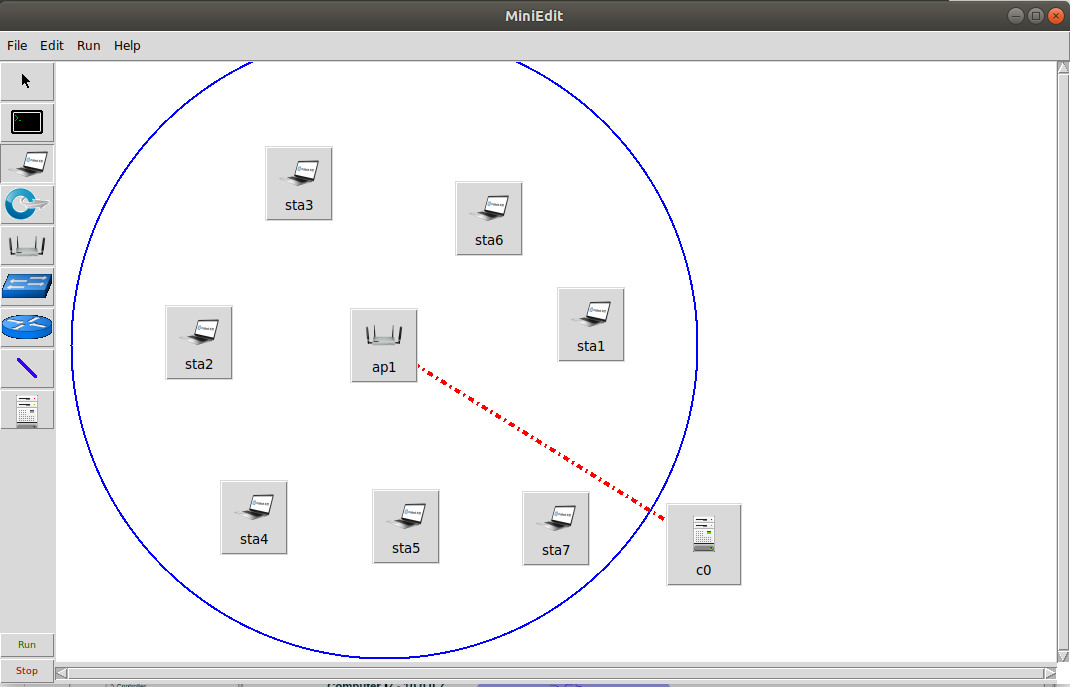
You can run Miniedit from the examples directory. For example:
~/mininet-wifi$ sudo python examples/miniedit.py
Socket Communication
The socket communication allows you to access methods implemented in Mininet-WiFi as well as send commands from APs, stations, cars, etc. You only need to start the socket server and access it through the socket client.
A sample file is available at examples/socket_server.py.
Some of the information you can get from the nodes include:
- position - get.node.position
- channel - get.node.wintfs[0].channel
- mode - get.node.wintfs[0].mode
- rssi - get.node.wintfs[0].rssi
- txpower - get.node.wintfs[0].txpower
Some of the information you can set to the nodes include:
- position = set.node.setPosition(“10,10,0”)
- txpower = set.node.setTxPower(10, intf=sta1-wlan0)
- range = set.node.setRange(100, intf=sta1-wlan0)
- roam = set.node.roam(bssid, intf=sta1-wlan0)